James Beard Award-winning Cookbook Author

Recipe and History: Peanut Butterscotch Chews

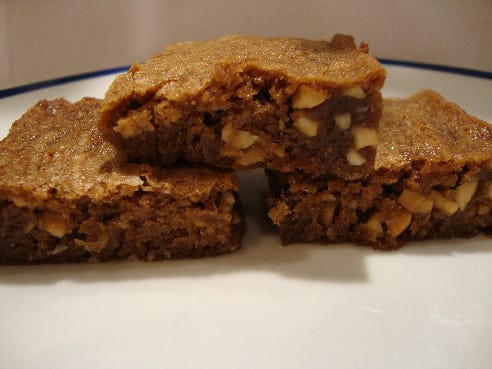
Butterscotch, cooked sugar with butter,  is always a winner in my book.  There’s just something about sweet, toasty, butteriness that makes it irresistible. In the recipe here, I’ve paired it with crunchy roasted peanuts in a blondie version of a brownie.  And the combination is, well, wow! The cookies are very moist, not too sweet, and–let me warn you–it’s hard to stop eating them.

Peanuts, not really a nut but a legume, are highly nutritious. It wasn’t until George Washington Carver proselytized and popularized peanuts that they became totally accepted by all segments of the American public.

About Peanut Butter

Back in 1902, soon after George Washington Carver began his historic work on peanuts, Mrs. Rorer, a prolific cookbook author and renowned cooking teacher in the late nineteenth century, printed this method for making peanut butter.

Roast the nuts, shell and blow off the brown skins. When making it in large quantities, it will pay to have a bellows for this purpose, or put the peanuts on a coarse towel, cover them with another towel, rub them gently, then blow off the skins. If you use salt dust them lightly with it and grind at once. Pack the butter into glass jars or tumblers, cover them and keep in a cool place. This may be used plain or diluted with water.

Mrs. Rorer’s peanut butter would separate over time, the oil rising to the top, making it necessary to stir it back into the thick paste underneath. It would be 21 years, 1923, before J. L. Rosefield found a way to keep peanut butter from separating. The process was used commercially by Peter Pan® peanut butter. Ten years later, Mr. Rosefield would market his own brand of peanut butter and call it Skippy®.

Mrs. Rorer didn’t use her peanut butter in cookies. In fact, according to Jean Anderson in The American Century Cookbook (Clarkson Potter 1997), the first recipe to use peanut butter in a cookie didn’t appear until 1915.

Peanut Butterscotch Chews

The batter is made quickly in a saucepan. Be sure not to overbake. The cookies must be moist and chewy. The cookies are very moist, not too sweet, and–let me warn you–it’s hard to stop eating them.
Course Dessert, Light Snack
Cuisine American
Servings 16 Cookies

Ingredients
  

  • 1 cup unbleached all-purpose flour stir flour, dip in dry measure to overflowing and sweep off excess; 5 ounces by weight
  • 1 teaspoon ground cinnamon
  • 1/2 teaspoon baking soda
  • 1/4 teaspoon salt
  • 1/2 cup dry roasted peanuts (2 ½ ounces), chopped medium-fine
  • 4 tablespoons unsalted butter 1/2 stick; 2 ounces
  • 1 cup firmly packed brown sugar (7 ounces), light or dark
  • 1/3 cup heavy cream
  • 1 large egg
  • 1 teaspoon pure vanilla extract

Instructions
 

  • Adjust an oven rack to the center position, and preheat the oven to 325 degrees.
  • Butter an 8-inch square baking pan and set aside.
  • Sift the flour with the cinnamon, soda, and salt 3 times; set aside.
  • Measure the peanuts and then chop with a large chef’s knife until medium fine; set aside.
  • Melt the butter in a heavy 2- to 3-quart saucepan over medium-low heat.
  • Add the brown sugar and stir constantly with a wooden spoon for 1 minute, until the sugar smells toasty. The sugar and butter will be thick and pasty looking.
  • Add the heavy cream and raise the heat to medium.
  • Stir occasionally as the mixture comes to the boil. As soon as the boil is reached (the surface is covered with thick bubbles), boil for exactly 1 minute, stirring once or twice.
  • Remove the pan from the heat and cool the butterscotch until it feels warm, about 10 minutes.
  • Beat in the egg with the wooden spoon until smooth, then beat in the vanilla.
  • Stir in the dry ingredients only until incorporated, then stir in the peanuts.
  • Spread the batter evenly in the pan.
  • Bake about 25 to 30 minutes, until a toothpick comes out with a few wet crumbs sticking to it. Do not overbake. These cookies should be very moist.
  • Set the pan on a wire rack to cool. The sides of the baked “cake” will be higher than the center. 
  • In about 5 minutes, tamp down the sides of the “cake” with your fingertips to level it with the center.
  • Cool completely and cut into squares.
  • Store airtight.  These keep well for a few days at room temperature.